The kitchen is one of the most-used systems in any camper van. If you are building a van you plan to actually travel and live in, the kitchen setup directly affects how well you eat, how much you enjoy the experience, and whether you end up cooking real meals or eating gas station food every day.
Getting the kitchen right means choosing the right components, planning a layout that works in a small space, and making sure everything integrates with your electrical and plumbing systems. This guide covers every major component, the options available, what things cost, and how to plan a kitchen that actually works.
What Goes Into a Camper Van Kitchen
A complete camper van kitchen includes five main components:
- Cooktop — for cooking meals
- Refrigerator — for keeping food cold
- Sink — for washing dishes and food prep
- Counter space — for prep work and general use
- Storage — for food, cookware, utensils, and supplies
How elaborate each of these gets depends on your build level, your electrical system, and how much you actually plan to cook. Some people are perfectly happy with a portable stove and a cooler. Others want a full kitchen that rivals a small apartment.
Cooktop Options
The cooktop choice has the biggest impact on the rest of your kitchen design because it determines whether you need propane systems, how much electrical capacity you need, and what ventilation is required.
Propane Cooktops
A built-in two-burner propane cooktop is the most common choice in van conversions. It is reliable, works without electricity, and provides strong, adjustable heat.
Pros:
- No electrical draw — doesn’t touch your battery bank
- Works in any weather and at any altitude
- Strong heat output for real cooking
- Simple and proven technology
Cons:
- Requires a propane tank, regulator, gas lines, and leak detection
- Needs ventilation (roof vent fan running while cooking)
- Propane tanks need refilling
- Open flame in a small enclosed space requires attention
Popular models: Camp Chef, Suburban, Dometic two-burner drop-ins. Prices range from $100 to $400 for the cooktop itself, plus $200 to $500 for the propane system (tank, regulator, lines, fittings).
Induction Cooktops
Induction cooktops use electricity from your inverter and battery bank instead of propane. They are clean, efficient, and eliminate gas from the van entirely.
Pros:
- No propane system needed (simpler build, fewer safety concerns)
- Easy to clean (flat glass surface)
- Precise temperature control
- Safer — no open flame, surface only heats with compatible cookware
Cons:
- Draws 1,000 to 1,800W, which requires a capable inverter (2,000W+) and a large battery bank (200Ah+ lithium minimum)
- Only works with magnetic cookware (cast iron, magnetic stainless steel)
- Drains your batteries faster than any other appliance
- If your batteries are low, you can’t cook
Popular models: Portable single-burner units from NuWave, Duxtop, and Isiler. Prices range from $50 to $150 for the cooktop. The real cost is in the electrical system capacity needed to run it.
Our take: We install both. If you have a robust electrical system (300Ah+ lithium, 400W+ solar), induction works great. For smaller systems or builds where electrical budget is tight, propane is the better choice.
Portable Stoves
A portable butane or propane stove (like an Iwatani or a Camp Chef single-burner) is the simplest option. It stores in a cabinet and comes out for cooking. No installation, no gas lines, no permanent modifications.
This works for basic builds and weekend warriors, but it takes up counter space when in use and doesn’t feel like a real kitchen. For a Basic tier build, a portable stove is a reasonable choice. For Standard and Premium builds, a built-in cooktop is worth it.
Refrigerator Options
The fridge is the second most important kitchen component and usually the most expensive single appliance in the kitchen.
12V Compressor Fridges
A 12V compressor fridge runs directly off your van’s battery bank. It works like a household fridge — compressor, thermostat, insulated box — but it is designed for low power draw and 12V operation. This is the standard for van conversions.
Top-loading (chest style):
- More energy efficient (cold air doesn’t fall out when you open the lid)
- Harder to organize (digging for items)
- Best brands: Dometic CFX, Engel, ARB
- 40 to 65 liter models: $600 to $1,200
Front-opening (upright):
- Easier to access and organize
- Slightly less efficient (cold air spills out when door opens)
- Can be built into cabinetry for a clean look
- Best brands: Dometic CRX, Isotherm Cruise, Vitrifrigo
- 40 to 65 liter models: $700 to $1,500
Power draw: A quality 12V compressor fridge draws 1 to 4 amps average, which means roughly 30 to 60Ah per day. Your electrical system needs to account for this continuous load.
Thermoelectric Coolers
Thermoelectric coolers (like Dometic TC series) are cheaper but far less effective. They can only cool about 30 to 40 degrees below ambient temperature, which means they don’t actually refrigerate reliably in hot weather. We don’t recommend them for anything beyond basic weekend use.
No Fridge (Cooler Only)
A high-quality cooler like a Yeti or RTIC works for weekend trips. You fill it with ice, and it keeps food cold for a few days. The obvious downside is that it needs ice regularly and doesn’t maintain a consistent temperature.
For any build where you plan to travel for more than a weekend at a time, a 12V compressor fridge is worth the investment.
Sink and Water System
A proper sink makes a bigger quality-of-life difference than most people expect. Washing dishes, rinsing produce, cleaning hands after cooking — it all matters when you are living in a small space.
Sink Options
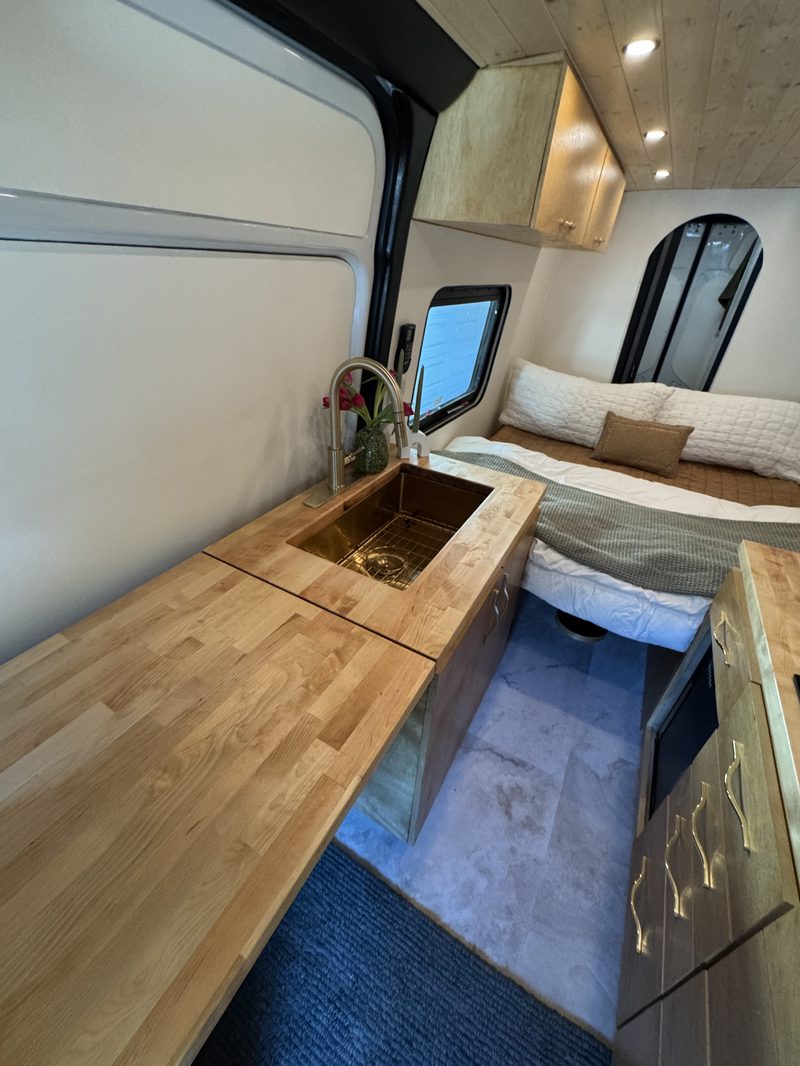
- Bar-size stainless steel sink: The most common choice. Compact, durable, and widely available. $30 to $100.
- Folding faucet: A faucet that folds flat below the counter line when not in use. Saves space and prevents the faucet from breaking during travel. $40 to $120.
- Standard RV faucet: A fixed faucet. Simple and cheap but takes up vertical space. $20 to $60.
Water System Components
The sink connects to a broader water system:
- Freshwater tank: 5 to 40+ gallons depending on build. $50 to $300.
- 12V water pump: Delivers water on demand when you open the faucet. Shurflo and Remco are the most common brands. $50 to $150.
- Water heater: A tankless propane or electric water heater gives you hot water at the sink and shower. Camplux or Girard units run $150 to $400.
- Gray water tank: Collects used water from the sink (and shower, if you have one). Same size as your freshwater tank or slightly smaller. $50 to $200.
Total water system cost (including sink, faucet, pump, tanks, heater, and plumbing lines): $400 to $1,200 depending on complexity.
Kitchen Layout Options
Layout is everything in a van kitchen. You have limited space, and how you arrange the cooktop, fridge, sink, and counter determines whether the kitchen is a pleasure to use or a frustrating compromise.
Galley Layout (One Wall)
Everything lines up along one wall of the van. Cooktop, sink, counter, and fridge in a row, with storage above and below.
Best for: Narrow vans, simple builds, maximizing floor space on the opposite side. Trade-off: Limited counter space because everything is in a line.
L-Shaped Layout
The kitchen wraps around a corner, usually along the side wall and the rear. This creates more counter space and a natural work triangle between the cooktop, sink, and fridge.
Best for: Most Sprinter and Transit builds. The most common layout we build. Trade-off: Takes up more floor space than a galley layout.
Rear Kitchen
The kitchen spans the full width of the van at the rear, typically accessed through the rear doors. This maximizes counter space and creates an indoor-outdoor cooking experience.
Best for: Vans that will be used primarily at campgrounds where the rear doors can stay open. Popular in European van builds. Trade-off: The bed and living space move forward, and you lose the rear doors for cargo loading.
Split Kitchen
Kitchen components are divided between two sides of the van — for example, the cooktop and sink on one side, the fridge and pantry on the other.
Best for: Longer wheelbases (170” Sprinter, 148” Extended Transit) where you have enough length to spread things out. Trade-off: Requires crossing the van while cooking, which can feel awkward in a narrow space.
Counter Space and Materials
Counter space is almost always the thing van owners wish they had more of. In a small kitchen, every square inch matters.
Materials
- Butcher block: Warm, natural look. Durable but needs periodic oiling. Can be cut to fit any shape. $100 to $400 for a van-size piece.
- Laminate: Cheap, lightweight, easy to clean. Wide range of patterns. $50 to $200.
- Solid surface (Corian or similar): Seamless, easy to clean, professional look. Heavier and more expensive. $300 to $800 for custom-cut pieces.
- Stainless steel: Durable, easy to sanitize, commercial kitchen feel. $200 to $600.
Tips for Maximizing Counter Space
- Use a sink cover or cutting board that sits over the sink when it is not in use
- Mount the cooktop with a flush or recessed install so the surface is usable when the stove is off
- Add a fold-out extension that creates temporary counter space when needed
- Use the top of a front-opening fridge as additional counter or storage surface
Storage and Organization
Van kitchen storage needs to be secure (things move while driving), accessible (you use the kitchen multiple times a day), and space-efficient.
Essential storage solutions:
- Drawers over doors: Pull-out drawers are far more usable than cabinet doors in a van. You can see and reach everything without getting on your knees.
- Magnetic spice rack: Mount to the wall or the side of a cabinet. Keeps spices visible and secure.
- Under-sink storage: The space under the sink fits cleaning supplies, water filters, and plumbing access.
- Overhead cabinets: Use the space above the kitchen counter for dry goods, plates, cups, and cooking supplies. Include positive-latch hardware so doors don’t fly open while driving.
- Pull-out pantry: A narrow pull-out between cabinets is perfect for canned goods, bottles, and tall items.
What We Build
At Emery Custom Builds, kitchens are a core part of every Standard and Premium conversion. Our Standard builds include a two-burner cooktop, a 12V compressor fridge, a stainless steel sink with hot and cold water, custom cabinetry with pull-out drawers, and solid counter surfaces.
Our Premium builds add upgraded appliances, larger fridges, more counter space, and premium materials like butcher block or solid surface countertops.
Take a look at our completed builds to see how we handle kitchen layouts in Sprinters, Transits, and ProMasters. Every kitchen is designed around how the owner actually plans to use the van.
Planning a van conversion? Call us at (714) 257-5446 or email hello@emerycustombuilds.com to talk about your kitchen setup and the rest of your build.