Choosing the right lithium battery for a van conversion is one of the most important decisions in your entire build. Your battery bank determines what you can run, how long you can stay off-grid, and how reliable your electrical system will be day after day.
We have installed lithium battery systems in dozens of van conversions at our shop in San Diego, CA. This guide covers everything we have learned about sizing, brands, wiring, charging, and costs so you can make the right call for your build.
Why Lithium (LiFePO4) Is the Standard for Van Conversions
If you are building a van in 2026, lithium iron phosphate (LiFePO4) batteries are the clear choice. They were not always the default. Five years ago, plenty of builds used AGM (absorbed glass mat) lead-acid batteries because lithium was expensive and less proven. That is no longer the case.
Here is why LiFePO4 has taken over:
Usable capacity. A 100Ah LiFePO4 battery gives you 80 to 100Ah of usable power. A 100Ah AGM battery only gives you about 50Ah because discharging below 50% significantly shortens its life. To get the same usable power from AGM, you need roughly twice the battery capacity.
Weight. A 100Ah LiFePO4 battery weighs about 25 to 30 lbs. A 100Ah AGM battery weighs 60 to 70 lbs. In a van where every pound matters for fuel economy and payload, cutting your battery weight in half is significant.
Cycle life. LiFePO4 batteries are rated for 2,000 to 5,000+ charge cycles. AGM batteries typically last 300 to 500 cycles. In practical terms, lithium batteries last 5 to 10+ years of daily use. AGM batteries in a van that gets regular use often need replacing after 1 to 3 years.
Charge rate. LiFePO4 batteries accept charge much faster than AGM. They can take a high charge current without damage, which means your solar panels and DC-DC charger can replenish the bank faster.
Flat discharge curve. LiFePO4 batteries deliver a steady voltage throughout their discharge cycle. Your lights stay bright and your appliances run consistently whether the battery is at 90% or 20%. AGM voltage drops steadily as the battery depletes, which can affect appliance performance.
Quick Comparison: LiFePO4 vs. AGM
| Feature | LiFePO4 | AGM Lead-Acid |
|---|---|---|
| Usable capacity | 80-100% of rated Ah | ~50% of rated Ah |
| Weight (100Ah) | 25-30 lbs | 60-70 lbs |
| Cycle life | 2,000-5,000+ cycles | 300-500 cycles |
| Lifespan (daily use) | 5-13 years | 1-3 years |
| Charge speed | Fast (high current OK) | Slow (bulk/absorb/float stages) |
| Voltage stability | Flat discharge curve | Drops steadily |
| Upfront cost (100Ah) | $250-$1,000 | $150-$300 |
| Cost over 10 years | Lower (one set of batteries) | Higher (3-5 replacements) |
The upfront cost of lithium is higher, but when you factor in the longer lifespan, lighter weight, and double the usable capacity, LiFePO4 is cheaper in the long run. We stopped installing AGM in our builds several years ago because the math just does not make sense anymore.
How to Size Your Battery Bank
The biggest question we get is “how big of a battery bank do I need?” The answer depends on what you plan to run and how long you want to run it without charging.
What Draws Power in a Van
Here are the common loads in a van conversion with their typical power consumption at 12V:
| Appliance | Power Draw | Daily Use | Daily Consumption |
|---|---|---|---|
| Compressor fridge (12V) | 2-5A (cycles on/off) | 24 hrs | 30-50Ah |
| LED lights | 1-3A | 4-5 hrs | 5-15Ah |
| Diesel heater fan | 1-3A | 8-10 hrs (cold nights) | 8-30Ah |
| Water pump | 4-6A | 10-15 min | 1-2Ah |
| Phone/laptop charging | 2-5A | 2-3 hrs | 5-15Ah |
| Roof vent fan | 1-3A | 6-8 hrs | 6-24Ah |
| Inverter (1000-2000W) | Varies by load | 1-2 hrs | 10-40Ah |
| Induction cooktop (via inverter) | 60-120A at 12V | 30-45 min | 30-60Ah |
A few notes on these numbers. The fridge is usually the single biggest constant draw because it runs 24 hours a day. The induction cooktop is the biggest peak draw, but you only use it for short periods. The diesel heater fan uses very little power compared to the heat it produces, which is one of the reasons diesel heaters are the go-to heating option for van builds.
Rule of Thumb for Sizing
Add up your expected daily consumption in amp-hours, then apply this formula:
Daily consumption (Ah) x days of autonomy without charging = minimum battery bank size
Most people want at least 1 to 2 days of autonomy (the ability to run everything without any charging from solar, alternator, or shore power). Here is what that looks like:
- Light use (weekender): 50-80Ah daily consumption x 1.5 days = 75-120Ah
- Moderate use (regular trips): 80-120Ah daily consumption x 1.5 days = 120-180Ah
- Full-time (all systems running): 120-200Ah daily consumption x 1.5 days = 180-300Ah
- Full-time with induction cooking: 180-250Ah daily consumption x 1.5 days = 270-375Ah
Round up to the nearest standard battery size. It is better to have a little more capacity than not enough.
Popular Capacities: Who Needs What
100Ah (1.2kWh)
Good for weekend camping with basic needs. Runs a fridge, LED lights, and phone charging for about a day without any charging. This is the bare minimum for a van conversion. We rarely recommend going this small unless you are on a very tight budget and only doing short trips with consistent driving (which recharges via DC-DC charger).
200Ah (2.4kWh)
The sweet spot for weekenders and occasional road trippers. Comfortably runs a fridge, lights, vent fan, water pump, and device charging for 1 to 2 days without charging. Paired with 200-400W of solar, a 200Ah system handles most weekend and week-long trip scenarios.
300Ah (3.6kWh)
Where most full-time builds land. Enough capacity for a fridge, lights, vent fan, water pump, diesel heater fan, regular laptop use, and moderate inverter use. Gives you a comfortable cushion for cloudy days or periods when you are not driving much.
400Ah (4.8kWh)
For full-time van life with heavy electrical use. If you are running an induction cooktop daily, working remotely with multiple devices, or camping in places with limited sun for extended periods, 400Ah gives you the headroom to stay comfortable. This is what we install in most of our Premium builds.
Brand Comparison: What We Recommend and Why
Not all lithium batteries are created equal. Here is an honest look at the brands we see most often in van builds.
Battle Born
Price: ~$900-$1,000 per 100Ah
Battle Born is based in Reno, Nevada and manufactures in the USA. They were one of the first companies to push LiFePO4 into the van conversion market, and they have built a strong reputation.
Pros:
- Made in USA with domestic customer support
- 10-year warranty
- Proven track record in thousands of van builds
- Drop-in replacement for Group 27/31 sizes
- Excellent BMS with built-in low-temperature cutoff
Cons:
- Most expensive option on this list
- The price premium is hard to justify purely on specs when cheaper options perform well
- 100Ah max per unit (need multiple for larger banks)
Who it is for: People who want the peace of mind of a well-known brand, US manufacturing, and strong warranty support. If budget is not the primary concern, Battle Born is a solid choice.
Victron Energy
Price: ~$500-$900 per 100Ah (Smart LiFePO4 line)
Victron is a Dutch company with a reputation for premium power electronics. Their batteries are designed to work within the Victron ecosystem (inverters, charge controllers, monitoring).
Pros:
- Excellent BMS with Bluetooth monitoring via the VictronConnect app
- Integrates with Victron inverters and charge controllers for system-wide monitoring
- Available in 100Ah, 150Ah, 200Ah, and 330Ah sizes
- Very consistent quality control
- Strong technical documentation
Cons:
- Premium pricing, especially for larger capacities
- Best value when paired with other Victron components (the ecosystem can lock you in)
- Heavier than some competitors at the same capacity
Who it is for: People who want a fully integrated monitoring system and are already using Victron components (inverter, MPPT, etc.). If you want to see exactly what every part of your electrical system is doing from your phone, Victron is hard to beat. We use Victron components in many of our builds and cover why we choose Victron in a separate guide.
Renogy
Price: ~$400-$500 per 100Ah
Renogy is one of the most recognized names in the DIY solar and van build space. They offer a wide range of batteries and components at mid-range pricing.
Pros:
- Good balance of quality and price
- Wide availability (Amazon, direct, many retailers)
- Full ecosystem of compatible components (solar panels, charge controllers, inverters)
- Decent 5-year warranty
- Good option for builders on a moderate budget
Cons:
- BMS is functional but not as sophisticated as Victron
- Quality control has been inconsistent in some product batches (check reviews on specific models before buying)
- Customer support can be slow during busy periods
Who it is for: DIY builders and budget-conscious customers who want reliable batteries without paying Battle Born or Victron prices. A solid middle-of-the-road choice.
SOK Battery
Price: ~$400-$700 per 100Ah/200Ah
SOK has gained a strong following in the van and RV community over the past few years. They offer 100Ah and 206Ah units at competitive prices with good specs.
Pros:
- 206Ah unit in a single battery is popular (fewer batteries, fewer connections)
- Competitive pricing for the capacity you get
- Built-in Bluetooth monitoring on newer models
- Internal heating option available for cold-weather use
- Active community of users sharing real-world data
Cons:
- Smaller company with less brand recognition than Battle Born or Renogy
- Warranty support is decent but not as established as the bigger brands
- Availability can be spotty (popular models sell out)
Who it is for: People who want maximum amp-hours per dollar and are comfortable with a smaller brand. The 206Ah unit is particularly attractive because one battery gives you more capacity than two 100Ah units from other brands.
LiTime (Formerly Ampere Time)
Price: ~$250-$400 per 100Ah
LiTime is the budget option. They rebranded from Ampere Time and sell primarily through Amazon.
Pros:
- Lowest price per amp-hour on this list
- Available in many sizes (50Ah, 100Ah, 200Ah, 300Ah)
- Decent reviews for the price point
- Good entry point for budget builds
Cons:
- BMS is basic compared to Victron or Battle Born
- Less established warranty and support infrastructure
- Long-term reliability data is still limited compared to older brands
- You are paying less and getting a less refined product
Who it is for: Budget-conscious builders who need lithium performance at the lowest possible price. If you are doing a DIY van conversion and every dollar counts, LiTime gets the job done.
Brand Comparison Table
| Brand | 100Ah Price | Warranty | BMS Quality | Monitoring | Best For |
|---|---|---|---|---|---|
| Battle Born | $900-$1,000 | 10 years | Excellent | Basic | Peace of mind, US-made |
| Victron | $500-$900 | 5 years | Excellent | Bluetooth app | System integration |
| Renogy | $400-$500 | 5 years | Good | Basic | Mid-budget builds |
| SOK | $400-$700 | 5-7 years | Good | Bluetooth | Value per Ah |
| LiTime | $250-$400 | 5 years | Basic | Basic | Tight budgets |
Series vs. Parallel Wiring
When you need more than one battery, you have two wiring options. This is a common source of confusion, so here is the straightforward explanation.
Parallel Wiring (Most Common in Vans)
Connecting batteries in parallel keeps the voltage the same (12V) and adds the amp-hours together.
- Two 100Ah 12V batteries in parallel = 200Ah at 12V
- Three 100Ah 12V batteries in parallel = 300Ah at 12V
- Four 100Ah 12V batteries in parallel = 400Ah at 12V
When to use parallel: The vast majority of van conversions use a 12V system. All standard van appliances (fridge, lights, vent fan, water pump, USB outlets) run on 12V. Parallel wiring is simpler and keeps everything at 12V.
Series Wiring (24V Systems)
Connecting batteries in series keeps the amp-hours the same and adds the voltage.
- Two 12V 100Ah batteries in series = 100Ah at 24V
- Four 12V 100Ah batteries in series = 100Ah at 48V
When to use series: 24V systems are uncommon in standard van conversions. They show up in larger builds (buses, box trucks, expedition vehicles) where the higher voltage reduces wire sizes and power losses over longer cable runs. If you are building a standard Sprinter, Transit, or ProMaster conversion, stick with 12V parallel.
Can You Combine Series and Parallel?
Yes. A series-parallel configuration lets you get both higher voltage and higher capacity. For example, four 12V 100Ah batteries wired as two series pairs in parallel gives you 200Ah at 24V. But this adds complexity and is rarely needed in a typical van conversion.
Our recommendation: Unless you have a specific reason for 24V (large bus conversion, very long wire runs, large inverter requirements), go with a 12V parallel system. It is simpler, more components are available for 12V, and troubleshooting is easier.
BMS: Battery Management System
Every quality LiFePO4 battery includes a built-in BMS. This is not optional, and you should never buy a lithium battery without one.
What the BMS Does
The BMS is an electronic circuit board inside the battery that monitors and protects the cells. It handles:
- Overcharge protection: Disconnects charging if voltage gets too high
- Over-discharge protection: Disconnects loads if voltage drops too low (prevents cell damage)
- Short circuit protection: Immediately disconnects if a short is detected
- Temperature protection: Shuts down charging in extreme cold (below 32F on most batteries) and disconnects if cells overheat
- Cell balancing: Keeps individual cells within the battery at the same voltage, which maximizes capacity and lifespan
Why Built-In BMS Matters
Some cheap lithium cells are sold without a BMS, marketed to people who want to build custom battery banks. Unless you are an experienced electrical engineer, do not go this route for a van build. A built-in BMS means the manufacturer has matched the BMS to the specific cells, tested the protection limits, and taken on the warranty liability.
The quality of the BMS varies by brand. Victron and Battle Born have the most sophisticated BMS systems with better cell balancing and communication features. Budget brands like LiTime have functional BMS units that handle the basics but lack advanced monitoring.
Low-Temperature Charging Protection
This is worth calling out specifically. LiFePO4 cells can be damaged if charged below freezing (32F / 0C). A good BMS will prevent charging below this threshold. If you plan to camp in freezing temperatures, verify that your battery’s BMS includes a low-temperature charging cutoff. Some batteries (like certain SOK models) also include an internal heating element that warms the cells before allowing charge in cold conditions.
Charging Your Battery Bank
A lithium battery for a van is only as useful as your ability to keep it charged. Most van builds use three charging sources that work together.
Solar Charging
Solar panels on the roof are the primary charging source for off-grid camping. Solar charges your batteries whenever the sun is out, with no engine running and no hookups required.
A solar charge controller (MPPT type is more efficient than PWM) sits between the panels and batteries, regulating the charge. For a 200Ah battery bank, we typically install 200 to 400W of solar. For 300-400Ah, 400 to 600W.
Realistic expectations: Solar output depends on sun angle, shade, clouds, and panel orientation. A 400W solar array might produce 200-300W in real-world conditions. On a good sunny day, that is roughly 80-120Ah of charge over 5 to 6 peak sun hours. On a cloudy day, you might get 20-40Ah.
Alternator Charging (DC-DC Charger)
A DC-DC charger connects your van’s starting battery (charged by the alternator while driving) to your house battery bank. While you drive, the DC-DC charger sends regulated current to your lithium batteries.
Important: You need a DC-DC charger. Do not wire lithium batteries directly to the alternator through an isolator or solenoid. LiFePO4 batteries accept charge at a very high rate, which can overheat and damage a standard alternator. A DC-DC charger limits the current to a safe level (typically 30-50A).
Popular DC-DC chargers:
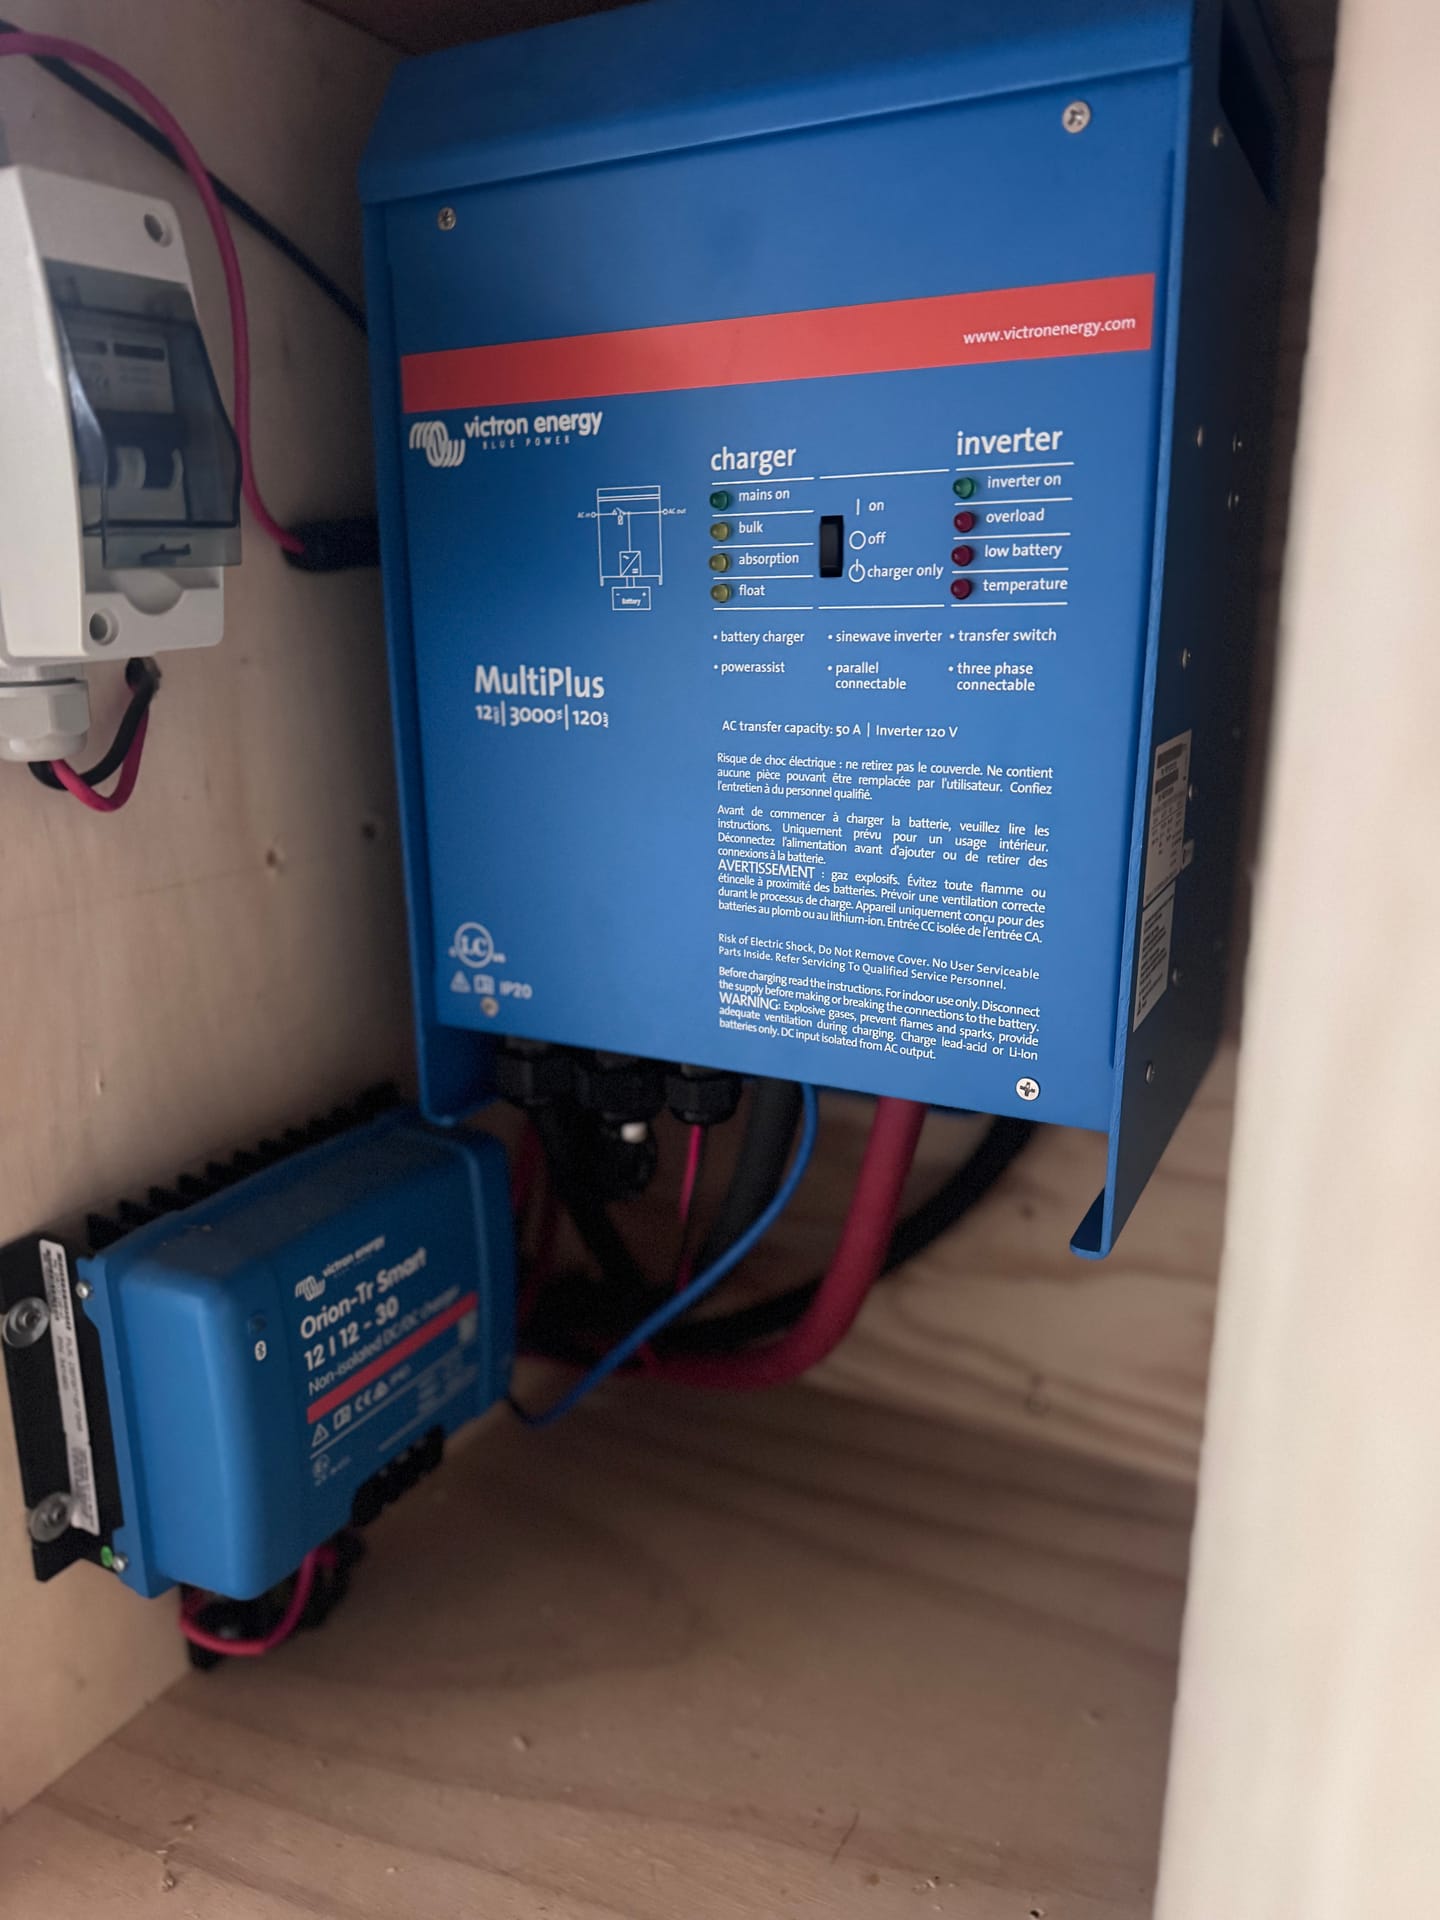
- Victron Orion-Tr Smart 12/12-30: 30A, Bluetooth monitoring, ~$250
- Renogy DCC50S: 50A, built-in MPPT solar input, ~$200
- Sterling Power BB1260: 60A, proven reliability, ~$350
At 30A, a DC-DC charger adds roughly 30Ah per hour of driving. A 3-hour drive puts about 90Ah back into your bank. At 50A, the same drive adds ~150Ah.
Shore Power Charging
Shore power (plugging into a standard outlet at a campground, friend’s house, or anywhere with AC power) charges your batteries through a dedicated AC charger or through your inverter/charger if you have a combo unit.
A quality charger/inverter combo like the Victron MultiPlus can charge your battery bank at 50-120A from shore power, fully recharging a depleted 200Ah bank in 2 to 4 hours.
How They Work Together
The beauty of a well-designed van electrical system is that all three sources can charge simultaneously. On a sunny day while driving with a shore power hookup, your batteries are getting topped off from solar, alternator, and AC power at the same time. In practice, you will usually have one or two sources active:
- Driving: Alternator (DC-DC charger) + solar
- Parked in sun: Solar only
- Campground: Shore power + solar
- Overcast, parked: Hoping for some solar, relying on stored charge
Most full-time van lifers find that solar plus alternator charging while driving is enough to stay topped off 90% of the time.
Installation Basics
Where Batteries Go
The most common locations for lithium batteries in a van conversion:
- Under the bed/sleeping platform: The most popular spot. Batteries sit in a secure compartment underneath the bed, easily accessible for maintenance. This keeps the weight low and centered in the van.
- Under a bench seat: Common in layouts with a dinette or L-shaped seating.
- Rear of the van: Sometimes under cabinetry near the back doors.
- Under the driver or passenger seat: Works for smaller single-battery setups.
The key requirements are that batteries must be secured so they cannot shift during driving, accessible for inspection, and protected from physical damage.
Ventilation
LiFePO4 batteries do not off-gas like lead-acid batteries during normal operation, so they do not require the same level of ventilation. However, in a rare fault condition, the BMS vents can release gas. Best practice is to mount batteries in a compartment that is not completely sealed and has some airflow path to the outside of the van.
Fusing
Every battery connection needs proper fusing. This protects your wiring and the van from fire in case of a short circuit. Key fusing points:
- Battery bank main fuse: Between the battery positive terminal and the bus bar/distribution panel. Size this for the maximum total system current.
- Inverter fuse: Between the battery and inverter. An inverter running at full load can pull very high current (a 2000W inverter on 12V can draw 170+ amps).
- Individual circuit fuses: Each circuit (lights, fridge, outlets, etc.) gets its own appropriately sized fuse at the distribution panel.
Use Class T or ANL fuses for the main battery and inverter connections. Use standard ATC/ATO blade fuses for individual circuits.
Wire Sizing
Wire sizing matters. Undersized wire creates resistance, generates heat, and in worst cases causes fire. The two factors that determine wire size are:
- Current (amps): Higher current needs thicker wire
- Length (round trip distance): Longer runs need thicker wire to prevent voltage drop
For the main battery-to-inverter connection (the highest current path in most systems), expect to use 2/0 AWG or 4/0 AWG cable depending on inverter size and cable length. This is thick, expensive cable. Keep this run as short as possible.
For 12V distribution circuits (lights, fridge, USB outlets), 10 to 14 AWG is typical depending on the load and distance.
Cost Breakdown: What a Complete System Actually Costs
The battery is just one part of a complete electrical system. Here is what a full lithium-based electrical system costs across three common build levels.
Budget System (~$2,500-$4,000)
| Component | Example | Cost |
|---|---|---|
| Battery | LiTime or Renogy 200Ah | $400-$700 |
| Inverter | 1000W pure sine wave | $150-$300 |
| DC-DC charger | Renogy DCC30S (30A) | $150-$200 |
| Solar panels | 200W (2x100W) | $200-$300 |
| Solar charge controller | 20A MPPT | $100-$150 |
| Fuse box + distribution | 12-circuit panel + fuses | $50-$100 |
| Wire, connectors, fuses | Various gauges | $200-$400 |
| Shore power inlet + charger | 30A inlet + charger | $150-$250 |
| Total | $1,400-$2,400 (parts) |
Add $1,000-$1,500 for professional installation labor. Total installed: roughly $2,500-$4,000.
Standard System (~$5,000-$8,000)
| Component | Example | Cost |
|---|---|---|
| Batteries | SOK 206Ah or 2x Renogy 100Ah | $500-$900 |
| Inverter/charger | Victron MultiPlus 12/2000 | $800-$1,200 |
| DC-DC charger | Victron Orion-Tr 12/12-30 | $200-$300 |
| Solar panels | 400W (2x200W) | $300-$500 |
| Solar charge controller | Victron SmartSolar 30A MPPT | $150-$250 |
| Battery monitor | Victron SmartShunt | $100-$150 |
| Fuse box + distribution | Blue Sea panel + bus bars | $100-$200 |
| Wire, connectors, fuses | Various gauges + lugs | $300-$500 |
| Shore power inlet | 30A inlet (charger built into inverter) | $50-$100 |
| Total | $2,500-$4,100 (parts) |
Add $2,000-$3,500 for professional installation labor. Total installed: roughly $5,000-$8,000.
Premium System (~$8,000-$15,000+)
| Component | Example | Cost |
|---|---|---|
| Batteries | 400Ah (Battle Born or Victron) | $2,000-$4,000 |
| Inverter/charger | Victron MultiPlus 12/3000 | $1,200-$1,800 |
| DC-DC charger | Victron Orion-Tr 12/12-30 (x2 for 60A) | $400-$600 |
| Solar panels | 600W (3x200W) | $450-$750 |
| Solar charge controller | Victron SmartSolar 50A MPPT | $250-$400 |
| Battery monitor | Victron Cerbo GX + touchscreen | $400-$700 |
| Fuse box + distribution | Blue Sea panel + bus bars + Lynx system | $200-$400 |
| Wire, connectors, fuses | Heavy gauge + premium lugs | $400-$700 |
| Shore power inlet | 30A inlet | $50-$100 |
| Total | $5,350-$9,450 (parts) |
Add $3,000-$5,000+ for professional installation labor. Total installed: roughly $8,000-$15,000+.
These numbers reflect real-world pricing as of 2026. Component prices fluctuate, and exact costs depend on specific products and your build’s requirements. For a detailed breakdown of how electrical fits into your total build budget, see our van conversion cost guide.
What ECB Installs and Recommends
At Emery Custom Builds, we have settled on a few go-to configurations based on reliability, performance, and value.
Batteries: We primarily use Victron Smart LiFePO4 batteries and SOK batteries depending on the build tier and budget. Victron integrates perfectly with the Victron inverters and charge controllers we use in most builds, giving full system monitoring through one app. SOK is our recommendation for customers who want great capacity per dollar without the full Victron ecosystem.
Inverter/charger: Victron MultiPlus in most builds. The combined inverter/charger simplifies the system and the monitoring integration is excellent.
DC-DC charger: Victron Orion-Tr Smart for Victron-based systems, Renogy DCC50S for budget builds.
Solar: We size solar to match the battery bank and the customer’s use case. 200W minimum, 400-600W for full-time builds. More detail in our solar guide.
Our approach: We design every electrical system around how you actually plan to use your van. A couple who weekends at established campgrounds with shore power does not need the same system as someone boondocking full-time in the desert. We would rather build you the right system than upsell you on capacity you will never use.
We handle all electrical design, wiring, installation, and testing. Every system we build goes through a full load test before delivery. To learn more about how we work, check out our process.
The Bottom Line
A lithium battery for a van conversion is a long-term investment that pays for itself through reliability, usable capacity, and lifespan. LiFePO4 is safer, lighter, and more efficient than AGM, and the price gap has narrowed enough that lithium makes sense for every build level.
Start with your daily power consumption, size your bank with a 1.5x cushion, pick a brand that fits your budget, and pair it with proper charging from solar, alternator, and shore power. If you get those fundamentals right, your electrical system will run reliably for years.
Ready to plan your van’s electrical system? We design and install complete lithium battery systems at our shop in San Diego, CA. Call us at (714) 257-5446 or email hello@emerycustombuilds.com to start your build.