Storage is the thing that separates a van you can actually live in from one that feels cramped after two days. We have built enough vans at this point to know that most people underestimate how much storage they need and overestimate how much space they have to work with. The good news is that vans have a surprising amount of usable volume if you know where to look for it.
This guide covers the van life storage ideas we actually use in our builds, not Pinterest concepts that look great in photos but fall apart on a dirt road in Utah. These are solutions that hold up, stay organized, and make daily life in a van feel normal instead of like a constant game of Tetris.
Overhead Cabinets
Overhead cabinets are the single most impactful storage addition in any van build. They run along one or both sides of the van above head height and use space that would otherwise be completely wasted.
In a Sprinter van, you typically have 10 to 14 inches of depth available above the window line before you hit the ceiling curve. That is enough for dishes, dry food, clothes, toiletries, books, and most daily-use items.
A few things matter here:
- Depth and height should match what you actually store. Cabinets that are too deep become black holes where things get lost in the back. 10 to 12 inches deep is the sweet spot for most items.
- Latch hardware is critical. Magnetic catches are not enough. One hard brake and your cabinet doors fly open and dump everything on the floor. Use push-to-open latches or marine-grade positive latches. We use these on every build.
- Lift-up doors vs. side-swing doors. Lift-up doors with gas struts keep the aisle clear when you are standing and reaching in. Side-swing doors work but can be annoying in a narrow van.
- Lighting inside cabinets is a small detail that makes a big difference. A strip of warm LED tape on the underside of each cabinet lights up your counters and makes it easy to find things at night.
We typically build overhead cabinets from Baltic birch plywood with a clear coat or painted finish. They add a lot of storage without making the van feel smaller because they sit above your sightline.
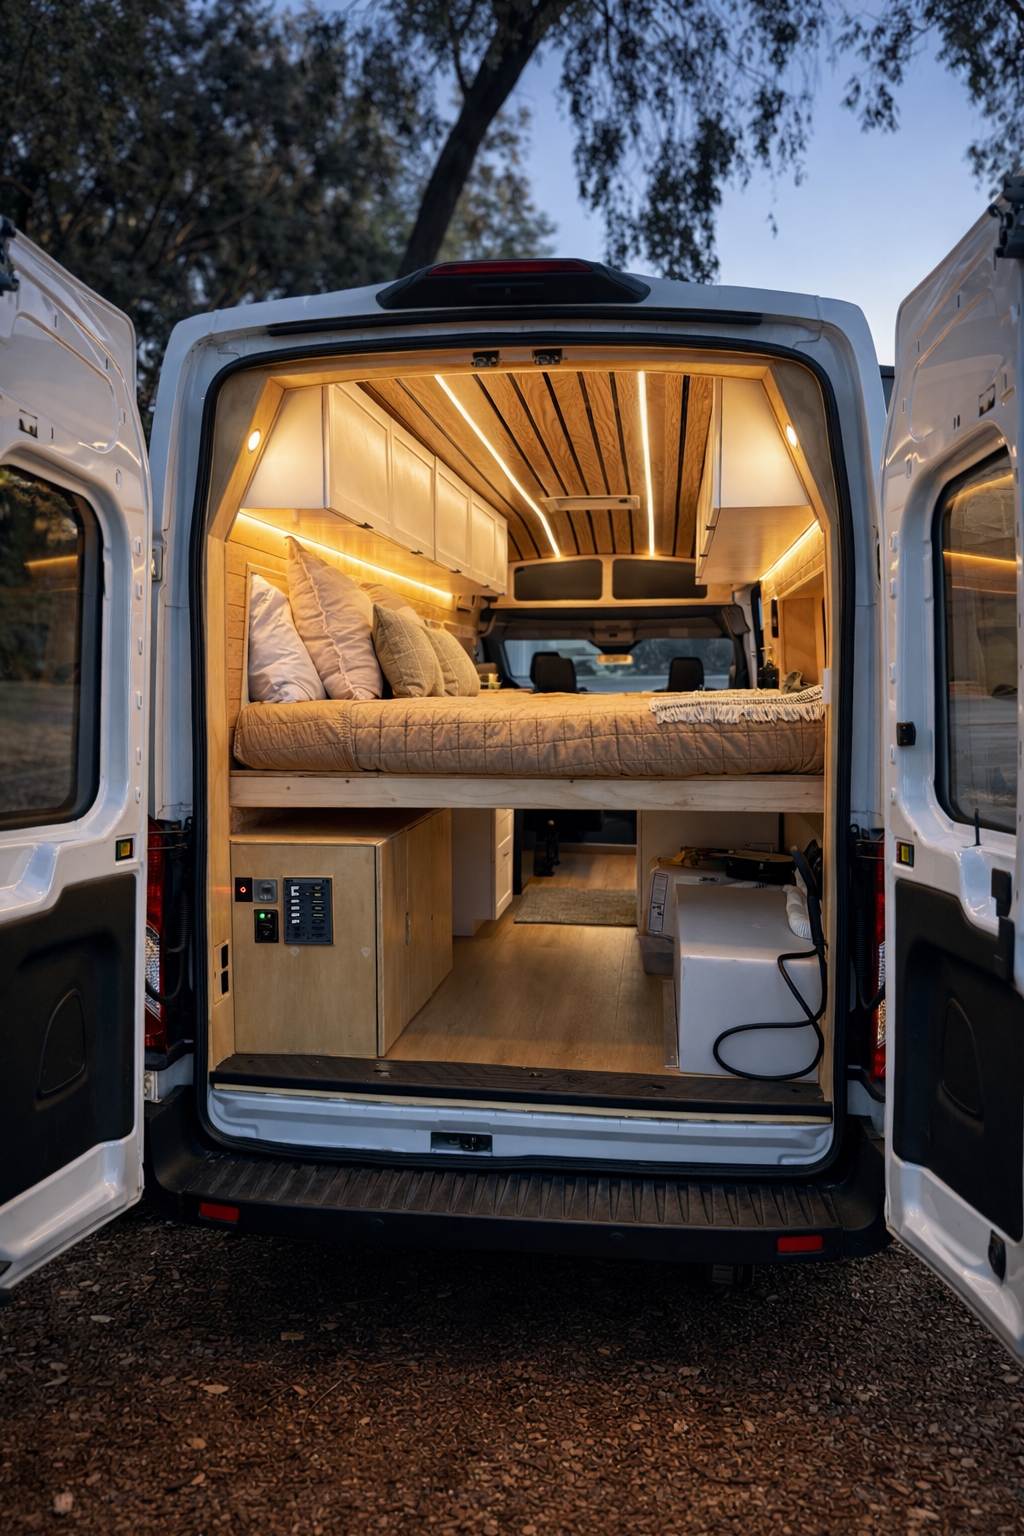
Under-Bed Garage
The garage area under a raised bed platform is the largest single storage zone in most van builds. Depending on how high you set the bed, you can get 20 to 40 cubic feet of space back there.
This is where bulky stuff lives: camping chairs, coolers, toolboxes, spare parts, recovery gear, and anything else that does not need to be accessed constantly. We usually build the garage with rear access through the back doors and sometimes add a side access panel or door for things you need during the day.
How to make the garage actually usable:
- Slide-out drawers or trays on heavy-duty drawer slides let you pull gear out without crawling inside. A single full-width slide-out tray on the bottom level changes the whole experience.
- Vertical dividers keep bins and bags from shifting while driving. Without them, everything migrates to one side after the first corner.
- Tie-down points or D-rings on the floor and walls let you strap down heavy items. Loose heavy gear in the garage is a safety issue, not just an organization issue.
- Carpet or rubber mat on the floor protects the surface and keeps things from sliding.
If you use the van for specific activities, you can design the garage around that. We have built garages with dedicated surfboard slots, bike wheel channels, and tool drawer systems. The layout depends on what you carry.
Slide-Out Drawers
Drawers are better than cabinets with doors for anything below waist height. You can see everything inside a drawer from above when it is pulled out. With a cabinet, you are bending down and reaching in blind.
We use full-extension ball-bearing slides rated for 100 pounds or more. Cheap slides sag over time, especially on a vehicle that bounces around on rough roads. Locking slides are worth the extra cost because they keep drawers from flying open while driving.
The kitchen area is where drawers make the biggest difference. A utensil drawer, a spice and condiment drawer, and a deep pot and pan drawer will handle most cooking needs. Inside each drawer, use dividers or small bins to keep things from rattling around.
Drawers also work well for:
- Clothing in the bedroom area, as an alternative to hanging closets
- Tools and electrical supplies in a dedicated maintenance drawer
- First aid, documents, and small essentials in a shallow drawer near the entry
The main trade-off with drawers is that they require more precise construction than open shelves or bins. The slides need to be parallel and level or the drawer will bind. If you are doing a DIY van conversion, take your time getting the slide mounts right.
Seat Base Storage
If your van has a front swivel seat setup or a bench seat in the living area, the base of that seat is prime storage territory. Lifting seat bases can hold a surprising amount of gear, and since most people sit on them every day, the items inside stay accessible.
We build seat bases as simple plywood boxes with a hinged top and a piano hinge. Gas struts hold the lid open while you dig around inside. This is a great spot for shoes, jackets, cleaning supplies, or anything you want within arm’s reach but out of sight.
For passenger seat setups, some people replace the OEM seat base with a custom box that incorporates storage underneath while still bolting to the factory seat mount points. This keeps the seat crash-rated while adding a usable storage compartment.
Door Organizers and Wall Pockets
The inside surfaces of your van doors, rear doors, and slider door are often completely unused. Fabric or MOLLE-style panel organizers on these surfaces add a lot of small-item storage without taking up any floor space or counter space.
We like hanging shoe organizers on the inside of rear doors for toiletries, snacks, tools, and small loose items. Each pocket is visible and accessible. For a more permanent solution, a rigid MOLLE panel or pegboard screwed to the door panel lets you clip and rearrange pouches, hooks, and holders.
Slider door options:
- Fold-down table that doubles as a storage shelf when closed
- Magnetic knife strip or tool strip
- Hooks for keys, hats, and leashes
- Small mesh pockets for phones, wallets, sunglasses
The important thing with door-mounted storage is weight. Van doors are not designed to carry a lot of extra load, so keep it to lightweight items. Heavy stuff on the slider door will wear out the rollers and track faster.
Ceiling Nets and Overhead Mesh
Elastic cargo nets mounted across the ceiling are one of the cheapest and most effective van life storage ideas out there. They cost almost nothing, install in minutes with a few eye bolts, and hold a surprising amount of lightweight stuff.
Good uses for ceiling nets:
- Pillows, blankets, and sleeping bags during the day
- Jackets and layers you want to grab quickly
- Maps, books, and magazines
- Stuffed animals and toys if you travel with kids
We usually install them above the bed area where they are easy to reach from a lying or sitting position. A second net above the cab area can hold hats, gloves, and other grab-and-go items.
If you want something cleaner looking, a solid shelf mounted at ceiling level with a lip or bungee cord across the front works the same way but feels more finished. The trade-off is that it takes up more headroom and costs more to build.
Magnetic Spice Racks and Small-Item Storage
Magnetic storage is underrated in vans. A steel plate or magnetic strip mounted on the wall near the kitchen lets you use magnetic-bottomed spice jars that stay put while driving and are visible at a glance. No digging through a drawer to find the cumin.
Beyond spices, magnetic strips work well for:
- Kitchen knives (use a magnetic knife bar like in a restaurant kitchen)
- Small metal tools like screwdrivers, pliers, and wrenches
- Bottle openers and other small steel items
The magnets need to be strong enough to hold during rough driving. We use neodymium magnets or high-quality magnetic bars rated for the weight they need to hold. Weak fridge magnets will not cut it.
Shoe Storage
Shoes are one of the most annoying storage problems in a van. They are bulky, dirty, and you usually have multiple pairs: hiking boots, sandals, camp shoes, maybe dress shoes if you work remotely. Leaving them on the floor takes up precious space and tracks dirt everywhere.
Solutions that work:
- Under-step compartments at the entry door. A hinged step that lifts up creates a natural shoe cubby right where you take them off.
- Slide-out shoe tray under the bed platform, accessible from the side or rear.
- Hanging shoe bag on the inside of the rear doors or slider door.
- Dedicated shoe cubby built into the lower cabinetry near the entry.
The best approach depends on your layout, but the principle is the same: shoes need their own spot near the door where they can air out and not contaminate everything else.
Hidden Compartments
Every van has dead space that most people never think about. The areas behind wheel wells, inside structural cavities, under floor panels, and behind wall panels can all be turned into hidden storage.
Hidden compartments are useful for:
- Valuables and documents you do not want visible. A compartment behind a wall panel or under a floor hatch that is not obvious to someone looking through the window.
- Seasonal gear you rarely need but want to keep in the van. Winter chains, extra blankets, rain gear.
- Tools and spare parts that you need to have but do not access often.
We build a lot of hidden compartments behind false panels in the wall areas between the insulation and the interior walls. A push-to-open latch with no visible handle makes it look like a regular wall panel. These are also great spots for running wiring and plumbing since they are already accessible cavities.
Modular and Adjustable Systems
If you are not sure exactly how you will use your van, or if your needs change seasonally, modular storage systems give you flexibility. Instead of building everything permanently into the structure, you can use systems that reconfigure.
Options include:
- L-track (airline track) mounted to the walls and floor. You can slide and lock tie-down rings, hooks, shelves, and accessories anywhere along the track. Popular with people who carry bikes, surfboards, and other gear that changes trip to trip.
- French cleat systems on the walls let you hang and rearrange shelves, bins, hooks, and holders. Simple to build from plywood and extremely versatile.
- Removable shelf inserts inside cabinets that lift out when you need the full cabinet height.
- Stackable bins in the garage area with a labeling system. Not glamorous, but practical and easy to reorganize.
Modular systems cost a bit more upfront in terms of hardware, but they pay off when you realize your storage needs changed six months into van life.
Gear-Specific Storage Solutions
If you have specific hobbies or activities that drive your van use, it is worth designing storage around those items rather than trying to make generic storage work.
Bikes: Interior bike mounts using fork-mount systems or wheel-channel racks in the garage keep bikes secure and damage-free. Some people use exterior hitch racks, but interior storage protects the bike from weather and theft.
Surfboards: Ceiling-mounted board racks above the bed or a dedicated slot in the garage area. For longer boards, a ceiling rack that runs from the cab to the rear works well in a Transit or Sprinter.
Tools: If you work on the road or just want to be self-sufficient, a dedicated tool drawer or wall-mounted tool panel keeps everything organized and accessible. We like drawer inserts with cut-out foam for frequently used tools.
Photography and drone gear: Padded drawer inserts or pelican-style cases that slide into a dedicated shelf slot protect sensitive equipment from road vibration.
Climbing and skiing gear: Tall, narrow compartments near the rear doors for skis, poles, crash pads, and ropes. Gear that is long and awkward needs purpose-built slots or it ends up taking over the whole van.
Planning Your Van Storage Layout
Before you build anything, spend time thinking about what you actually carry and how often you access it. We tell our customers to sort their gear into three categories:
- Daily items (clothes, toiletries, cooking supplies, electronics) need to be within arm’s reach from your main living positions.
- Trip items (camping gear, hiking gear, activity-specific equipment) should be accessible but can require a few extra steps.
- Rarely used items (tools, spare parts, seasonal gear, documents) can go in harder-to-reach spots like deep garage areas or hidden compartments.
This framework drives the whole layout. The daily stuff goes in overhead cabinets, kitchen drawers, and door pockets. Trip items go in the garage or under-seat storage. Rarely used items fill the hidden compartments and deep storage areas.
If you want to see how these storage ideas come together in real builds, check out our project gallery. Every build has different storage priorities based on how the owner uses the van.
For people considering full-time van life, storage planning is even more critical. You are fitting an entire household into roughly 60 to 80 square feet, and every item needs a home or it creates clutter fast.
Let Us Build Your Storage Solution
Every van we build at our shop in San Diego, CA starts with a conversation about how you use your van and what you need to carry. Storage is not an afterthought in our builds. It is designed into the layout from day one.
If you are planning a van conversion and want storage that actually works for your life, tell us about your build and we’ll get back to you with a custom estimate.